
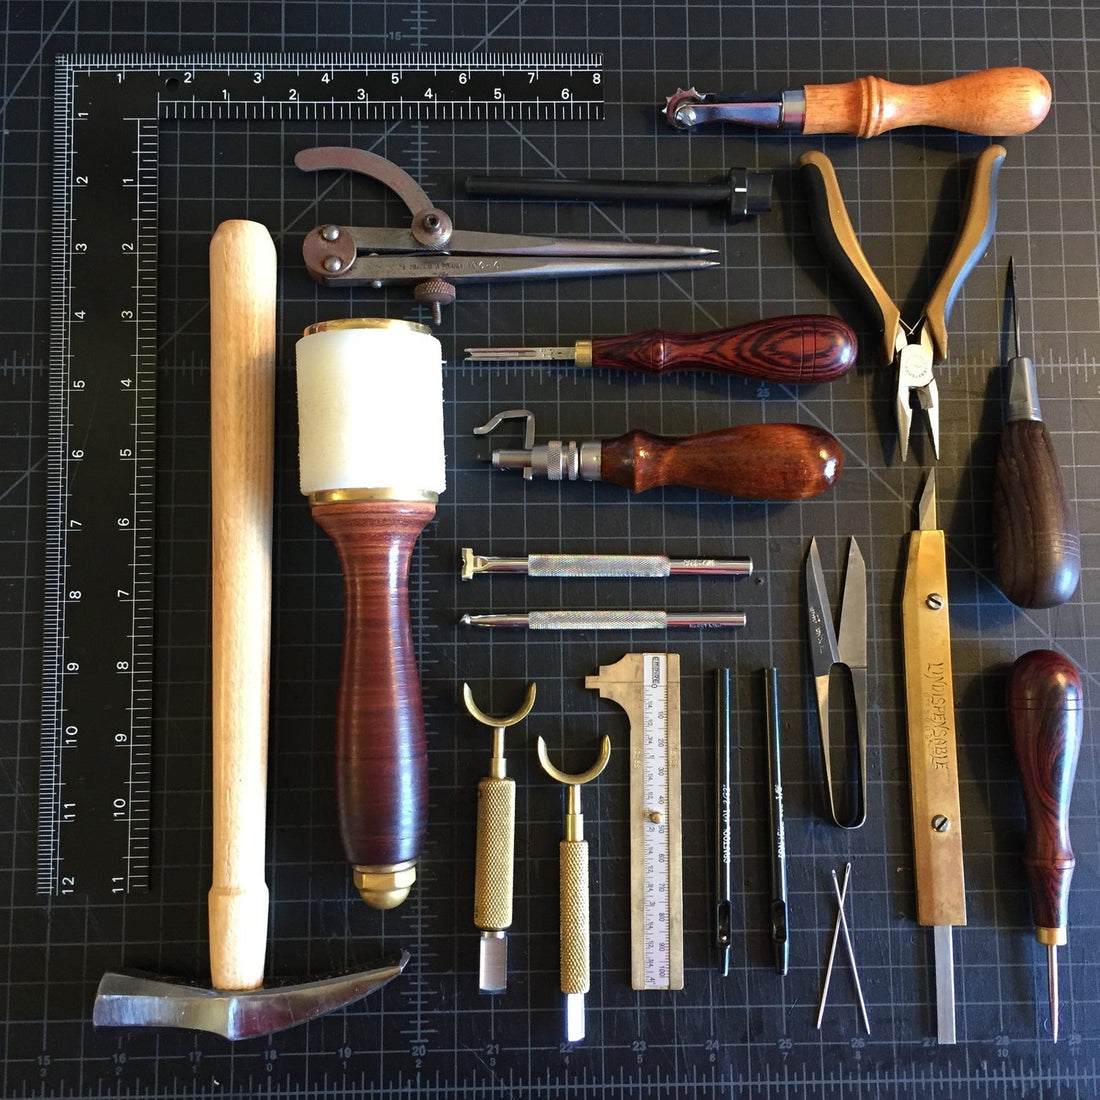
From Zero to Workshop: The 10 Tools I Use for Long-Lasting Parts
Before you buy: 3 quick criteria
- Safety and control : tools that cut cleanly and allow for precise repetition.
- Versatility : few pieces that can be used for many projects.
- Easy maintenance : edges and surfaces that you can maintain at home.
1) Utility knife / quality cutter
Your "pen" in leather. Look for replaceable blades and a stable guide. With a metal ruler and a mat, you'll achieve straight cuts and controlled curves.
2) Skiving tool
Thins the leather where needed: flaps, folds, and wallet openings. Gain flexibility without losing strength in the rest of the piece.
3) Cutting mat (self-healing)
Protects your table, extends the life of your cutting edge, and adds measuring references. Essential if you want repeatable, straight cuts.
4) Edge beveler
It rounds the edges after cutting. This microbevel prepares the edge for burnishing and prevents fibers from rising during use.
5) Edge burnisher/polisher
With water or gum tragacanth, transform a "raw" edge into a smooth, sealed edge. It's a huge leap in visual and tactile quality.
6) Punches (hole punch or pliers)
Clean, correctly sized holes for hardware (rivets, snaps, buckles) and for marking seams. Avoid biting into the edge.
7) Wing divider
Mark lines parallel to the edge and distribute stitches. This is the difference between a straight seam and one that "wobbles."
8) Punch / awl
To open the thread and mark. With your hand firmly planted, the holes line up and the stitching flows smoothly.
9) Mallet or maul (non-metallic)
For striking punches, hole punches, and stamps without damaging the handle or transmitting vibrations to the wrist.
10) Leather needles + waxed thread
The classic hand-stitched saddle stitch is durable and repairable. Pair blunt needles with thread appropriate for the leather's thickness.
With this set, you can cut, trim, punch, sew, and finish with professional edges. It's a solid foundation for wallets, cases, and accessories.
Extras that make a difference (when appropriate)
- Long metal ruler and set square: straight cuts and exact angles.
- Contact adhesive : fixes before sewing and prevents shifting.
- Fine sandpaper (600–1000) : prepares the edge for a mirror-like polish.
- Gloves/razor : safety when working with rebates and long cuts.
How to set up your first workflow
- Cut on a mat with a metal ruler.
- Cut back where there is a fold or overlap.
- Beveled visible edges.
- Glue and mark the seam line with the divider.
- Drill (or awl) along the mark.
- Sew with double needle and waxed thread.
- Burnish edges until sealed and shiny.
Common Mistakes (and How I Fix Them)
- “Bite” cut : blade worn or missing guide. Change blade and rest the entire edge.
- Hairy edges : lack of bevel and patience when polishing. Fine bevel + several short strokes.
- Serpentine stitch : Irregular pre-mark. Use the divider and check every 3–4 stitches.
- Deformed holes : metal mallet or side impact. Change to non-metallic mallet and vertical impact.
FAQ
Can I start without a skiver?
You can, but manual skiving with a blade requires more practice and consistency. A basic skiver saves frustration.
What thickness of leather to start with?
For small wallets and cases, 1.6–2.2 mm vegetable tanned works well and allows for nice edging.
Edge first or sew first?
I prepare the edges (bevel and sand) after sewing and burnish to seal the assembly.